REVIEW · KANDY
Kandy: Interactive Batik Workshop
Book on GetYourGuide →Operated by Soul Sri Lanka · Bookable on GetYourGuide
Wax first, art second, Sri Lankan style.
This Kandy batik workshop in Ampitiya is interesting because it’s not just watching a process. You follow a batik expert through wax resist, dye mixing, and final wax removal, then leave with a cloth that actually came from your own hands. It’s also set up for a small group vibe, capped at 10 people.
I love the hands-on part most: you’ll try tools like the tjanting plus a funnel and Henry tool to place wax precisely. I also like that the teaching feels personal, with instructors (often Anuja and Manugi) helping you make your own design, sometimes including name-writing in Sinhalese if you want to go that route.
One drawback to consider: the workshop happens in a working craft setting, so staining is possible even if the team is careful. Also, the meeting address can be a little tricky to locate, so you’ll want a clear plan for how you’re getting there.
In This Review
- Key highlights at a glance
- Batik in Ampitiya: what this workshop really teaches
- Meet your instructors and get your design plan going
- Fabric choice and wax prep: the resist system, plain and simple
- Wax effects you’ll try: stamping, spraying, cracking, and more
- Dyes and dye mixtures: napthol, vat, and reactive dyes
- Dewaxing day: wax burning and wax boiling (dewaxing)
- What you take home: your own cloth, plus care tips
- Price and value: is $28 for batik in Kandy a fair deal?
- Logistics in real life: finding 218/6 Thalapiyannawa Rd
- What to wear and what to bring so you don’t stress
- Who should book this batik workshop in Kandy
- Should you book Kandy: Interactive Batik Workshop?
- FAQ
- Where is the meeting point for the Kandy batik workshop?
- How long does the workshop last?
- What is the price per person?
- What language is the workshop taught in?
- Is transportation to the workshop included?
- Is lunch included?
- What should I bring?
- Is it suitable for everyone?
- What are the cancellation rules?
Key highlights at a glance
- Hands-on wax resist: you select fabric, apply wax, then dye over your protected areas
- Tool time: funnel, tjanting, and Henry tool go from demo to your own work
- Multiple effects: spraying, stamping, cracking, brush arts, and wax designing
- Dye basics explained: napthol, vat, and reactive dye applications and mixtures
- Finish with dewaxing: wax burning and wax boiling to reveal the final pattern
Batik in Ampitiya: what this workshop really teaches
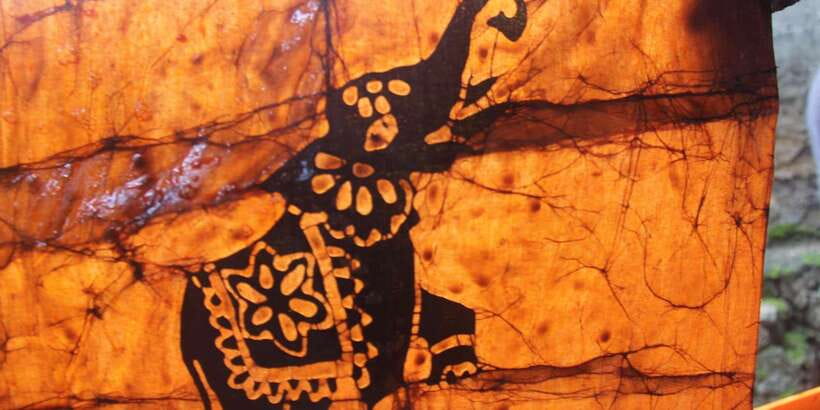
Kandy’s batik scene can feel touristy in some places. This workshop doesn’t. It’s built around the real workflow of wax-resist cloth: wax blocks dye, dye bonds to exposed fabric, and then you remove wax to reveal the pattern.
You’ll spend about 3.5 hours learning the craft steps, but the value is in how the session turns technique into something you can repeat later. Instead of buying a souvenir that looks nice, you’ll understand why it looks that way.
Even the “small” details matter. You’re not just picking a design and coloring. You’re choosing fabric, planning where wax should go, and then thinking about how different dye types behave when you apply them over protected areas.
You can also read our reviews of more tours and experiences in Kandy
Meet your instructors and get your design plan going
The workshop is led by an English-speaking instructor, and the vibe is family-led. In the reviews, names like Anuja and Manugi show up again and again, with additional help sometimes from family members (like Manuth).
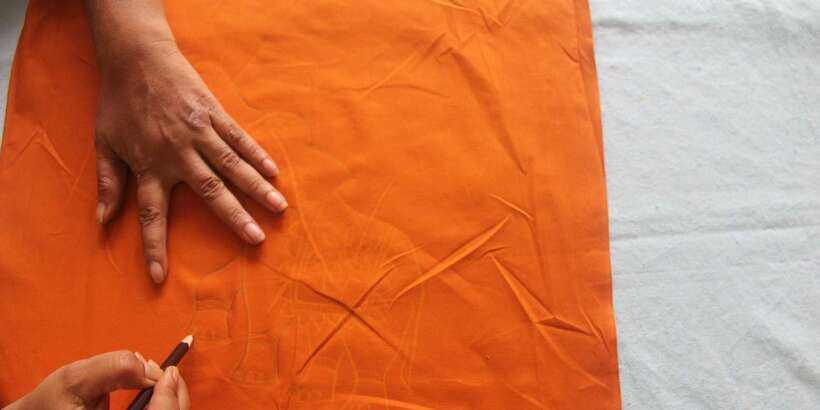
Before you start waxing, you’ll talk through your design. Some people prefer to follow a stencil or template, and others go freehand. Either way, the team helps you translate your idea into something workable for wax-resist printing.
If you’re not the artsy type, that’s still fine. The teaching style described in the reviews sounds patient and step-by-step, including help correcting mistakes. I think that matters a lot because batik is “slow logic”: if you mess up one wax placement, you learn why it happened.
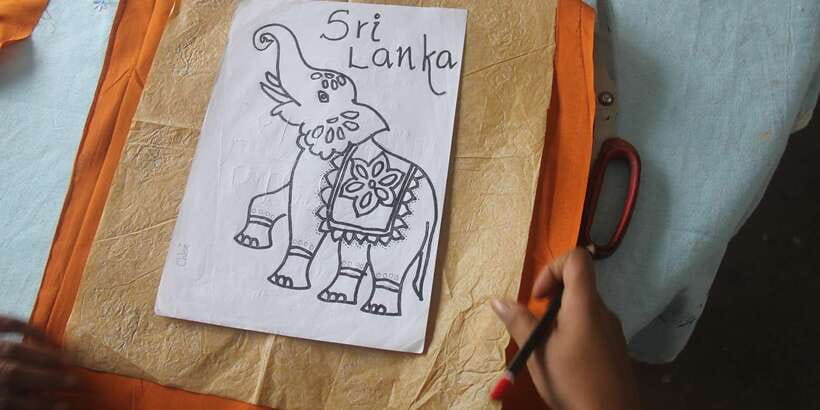
And yes, some participants end up learning to write their name in Sinhalese. That’s a small optional win, but it turns the cloth from souvenir into keepsake.
Fabric choice and wax prep: the resist system, plain and simple
The session starts with choosing a fabric. That’s not just housekeeping. In batik, the cloth’s base matters because dyes and wax interact with it differently.
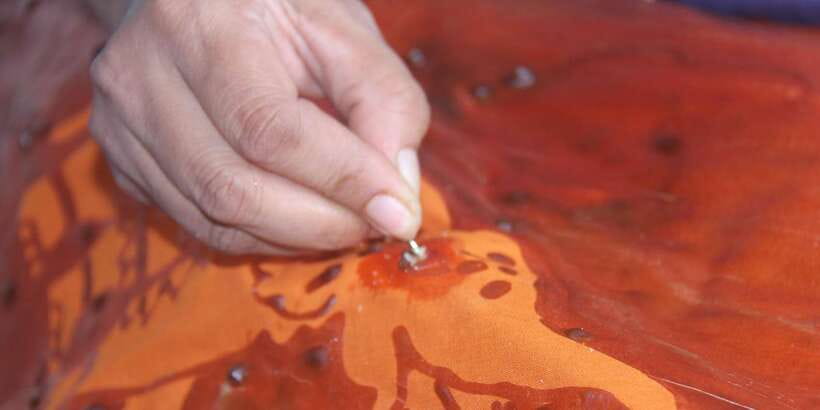
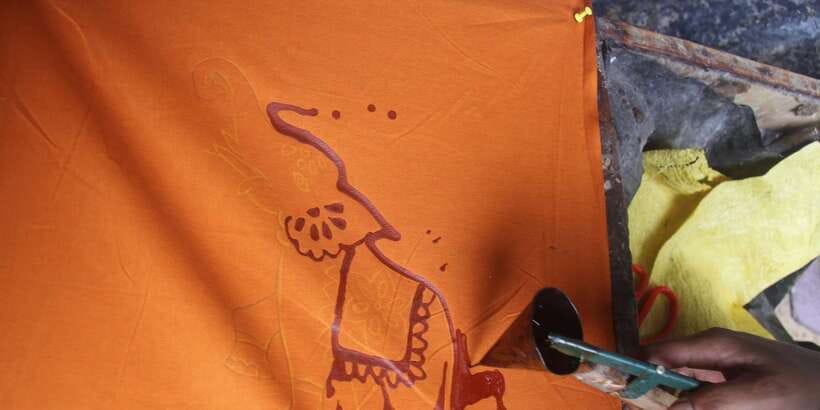
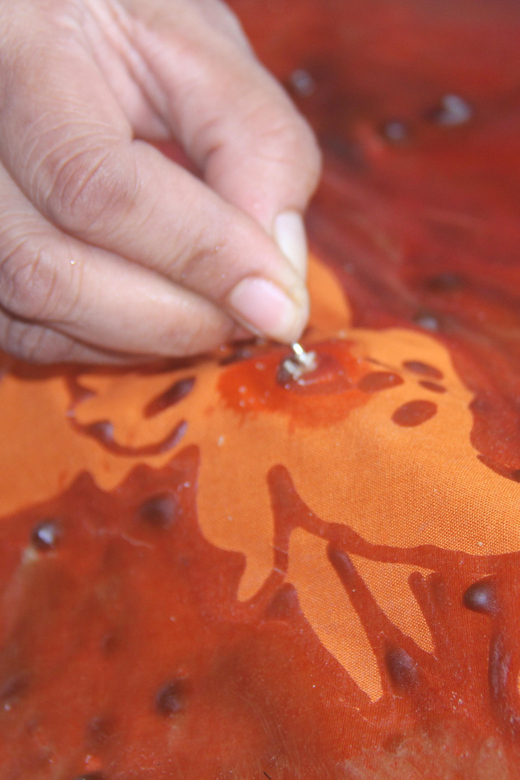
Then you move into wax mixtures and waxing techniques. The core concept is the resist method: you apply wax where you want no dye (or lighter dye), and then you dye the fabric so color only reaches the areas without wax.
You’ll practice with a set of tools commonly used in batik work. The workshop lists tools like a funnel, tjanting, and the Henry tool. Even if you’ve never used any of them before, you’ll learn what each tool is for—mainly how to control wax lines, edges, and fills.
From a practical standpoint, expect the early minutes to feel a bit like learning to write with a new pen. You might get wobbles or uneven lines. The point is: you’re building muscle memory for wax placement, not creating museum art on attempt one.
Wax effects you’ll try: stamping, spraying, cracking, and more
Batik isn’t one technique. It’s a set of effects that can layer together into a pattern with depth and texture.
In your workshop, you’ll be guided through multiple wax methods such as:
- wax spraying
- stamping
- cracking effects
- brush arts
- wax designing
This is one of the most satisfying parts because it changes what you’re making in a visible way. A stamped section won’t look like a sprayed section. Cracking gives a different texture than clean lines. Brush arts can soften edges.
Even if you don’t fully master each effect, you’ll leave understanding what to try next time you see batik at a shop. That’s the difference between “I watched it” and “I did it.”
Dyes and dye mixtures: napthol, vat, and reactive dyes
Once your wax is in place, you’ll learn about dyes and dye application strategies. The workshop specifically mentions napthol dyes, vat dyes, and reactive dyes, plus dye mixtures and techniques.
Here’s the useful way to think about it: wax-resist is only half the story. The other half is how dye behaves—how it soaks in, how it layers, and how bright or muted the final color looks.
So in a few sessions of a dye-focused craft, you’re not turning into a dye chemist. You’re learning enough to make smart choices:
- how to expect different results based on dye type
- how dyeing over wax creates crisp or softer edges
- how to sequence dye so your pattern shows up cleanly
If you’re planning to bring your cloth home and later wear or gift it, this dye learning helps you understand why after-dye care matters.


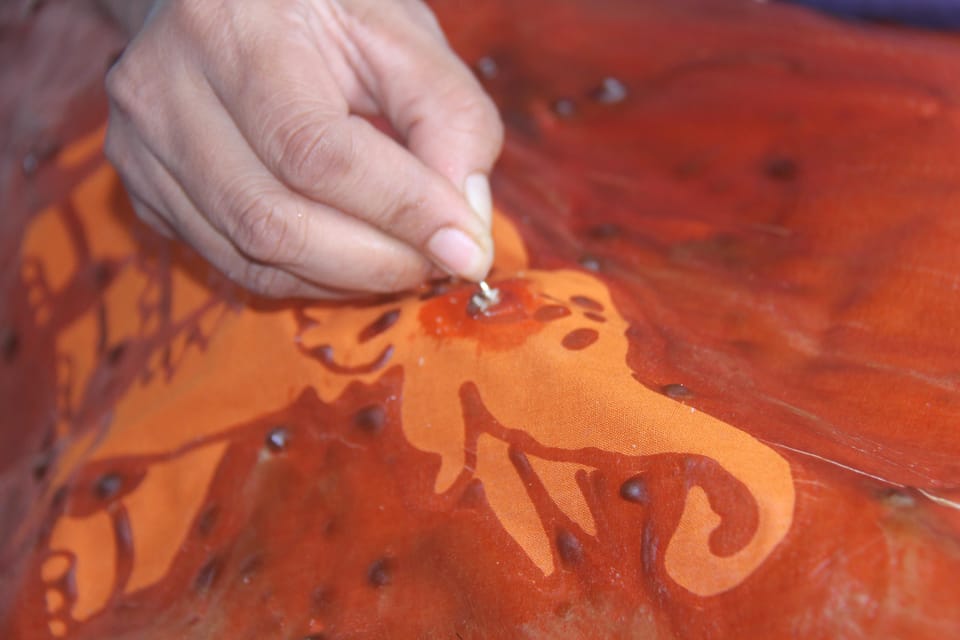
Dewaxing day: wax burning and wax boiling (dewaxing)
The final transformation is dewaxing—when the wax is removed and your pattern appears fully. The workshop explains two approaches: wax burning and wax boiling.
This step is what turns the whole process from “wax layers and color tests” into the finished batik look. Until wax removal, you’re working with a plan. After dewaxing, you see the result of every decision you made: where wax resisted dye, where it didn’t, and where textures showed up.
You’ll also better understand why batik artists are so focused on wax control. Small differences in wax placement can become large differences after dye and dewaxing.
Even if you’re worried about messing up, dewaxing is where the craft shows its logic. You learn that batik isn’t about perfection every time. It’s about process and pattern.
What you take home: your own cloth, plus care tips
The workshop includes cloth, wax, and dyes for your session, and the final product is something you create. Based on the reviews, you’ll go home with a piece like a bag, laptop cover, or a cloth souvenir designed from your session (the exact item can vary, but the idea stays the same: you leave with what you made).
One review also mentions getting instructions on how to take care of your batik after you leave. That’s genuinely helpful, because wax-resist textiles can need different handling than mass-produced fabric.
Before you head out, take a moment to check:
- the placement of your main design elements
- whether any areas look more muted (sometimes that’s part of the look)
- how the cloth is meant to be folded or stored
You’ll want to protect it on the ride back. Carry it flat if you can, or at least avoid crushing it under heavy items.
Price and value: is $28 for batik in Kandy a fair deal?
At $28 per person, this is priced like a “craft experience,” not like a souvenir purchase. What makes it feel fair is that the session includes the stuff people usually have to pay extra for elsewhere: tools and equipment support, plus cloth, wax, and dyes.
You’re also getting instruction in wax application and dye strategy, not just a guided activity. The time commitment is substantial for a half-day: 3.5 hours with enough hands-on practice that your cloth becomes a real product of the workshop.
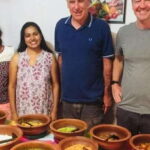
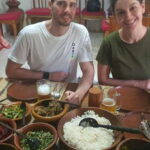
What’s not included is also clear: transportation and lunch. Still, some reviews describe added food—tea plus sandwiches or even a lunch/paked-lunch setup. If you care about getting a full meal, I’d confirm what’s included for your specific slot so you don’t plan around a surprise.
If your goal is to buy a meaningful, personal souvenir, this usually beats the “cheap print with no story” option. You’re paying for the skill and the finished fabric, and you’ll understand the process when you show someone your work.
Logistics in real life: finding 218/6 Thalapiyannawa Rd
The meeting point is listed as 218/6 Thalapiyannawa Rd, Ampitiya. Multiple reviews say this address can be hard to find on mapping apps.
My practical advice: don’t treat navigation as your only strategy. Ask your tuk-tuk driver to call ahead or ask neighbors for directions. One review even points out that Google Maps may not be accurate there.
If you’re staying in central Kandy, plan for a short buffer so you’re not rushing. Craft workshops run on time because wax and dye steps need the clock to stay consistent.
What to wear and what to bring so you don’t stress
The workshop asks for comfortable clothes. Based on the nature of wax and dye, I strongly suggest bringing a change of clothes. Paint or dye can get on fabric, and you don’t want to end your day with stained travel wear.
Also consider:
- wear something you can sit in for 3.5 hours
- avoid your favorite shirt
- bring a way to keep your finished cloth protected on the way out
You don’t need special art supplies. The session includes tools and materials, so your main job is showing up ready to work with your hands.
Who should book this batik workshop in Kandy
This works best if you:
- want a hands-on cultural activity in Kandy that’s not centered on sightseeing
- like crafts where there’s a visible “before and after”
- enjoy learning by doing, even if you’re not confident artistically
It may not be ideal if you have back problems or if you’re pregnant, since the workshop is described as not suitable for those conditions and you’ll likely be standing and working at a craft station.
If you’re traveling with a teenager who likes creative projects, this is the kind of activity that can hold attention. The family-led, small group format also makes it easier to ask questions without feeling rushed.
Should you book Kandy: Interactive Batik Workshop?
Book it if you want a real Kandy memory that’s not just photos. The hands-on wax work, dye basics, and dewaxing reveal create a clear payoff in only 3.5 hours. The small group and English instruction also make it less intimidating than many “watch and learn” workshops.
Skip or compare if you hate mess risks or if you need transportation and meals fully handled for you. Also, if the address-finding challenge would stress you out, plan transport with extra care.
For most people doing Kandy for several days, this is a great way to slow down, learn a traditional craft step-by-step, and go home with something you made yourself.
FAQ
Where is the meeting point for the Kandy batik workshop?
The studio address is 218/6 Thalapiyannawa Rd, Ampitiya.
How long does the workshop last?
The duration is 3.5 hours.
What is the price per person?
The price is $28 per person.
What language is the workshop taught in?
The instructor speaks English.
Is transportation to the workshop included?
No. Transportation to and from the workshop is not included.
Is lunch included?
No. Lunch is not included (the workshop includes herbal tea).
What should I bring?
Wear comfortable clothes. Bringing a change of clothes can be useful if paint or dye gets on what you’re wearing.
Is it suitable for everyone?
It is not suitable for pregnant women or people with back problems.
What are the cancellation rules?
There is free cancellation up to 24 hours in advance for a full refund.